Is your car showing signs of overheating, or do you notice mysterious puddles of coolant beneath it? These could be indications of a failing water pump, a critical component in your vehicle’s cooling system. While it might seem like a daunting task, replacing a water pump can be a rewarding DIY project for the mechanically inclined, saving you significant labor costs. This guide will walk you through the process, step by step, empowering you to tackle this essential automotive repair with confidence.
What is a Car’s Water Pump?
The water pump is the heart of your car’s cooling system, essential for maintaining optimal engine temperature. Its primary function is to circulate coolant (a mixture of antifreeze and water) throughout the engine block, cylinder head, radiator, and heater core. This continuous flow transfers heat away from the engine, dissipating it through the radiator and preventing dangerous overheating.
Water pumps typically consist of an impeller, a shaft, and a housing, and are often driven by either a serpentine belt (accessory drive belt) or, in some cases, the timing belt or timing chain. The impeller, a rotating disc with vanes, creates the centrifugal force needed to push coolant through the system.
Why Water Pumps Fail and Common Symptoms:
Over time, water pumps can wear out due to constant operation, exposure to corrosive coolant, or bearing failure. Common signs of a failing water pump include:
- Coolant Leaks: Often visible as a puddle under the car, originating from the pump’s weep hole or mounting gasket.
- Overheating Engine: The most serious symptom, indicating the pump can no longer circulate coolant effectively.
- Whining or Grinding Noises: Worn bearings inside the pump can create audible friction.
- Steam from Under the Hood: A clear sign of an overheating engine and a potential water pump issue.
- Loose Water Pump Pulley: Excessive play in the pulley suggests bearing failure.
|
Our Picks for the Best Air cooler in 2026
As an Amazon Associate I earn from qualifying purchases.
|
||
| Num | Product | Action |
|---|---|---|
| 1 | Portable Air Conditioners, Swamp Cooler Portable AC Unit for Room, Windowless Cooling Fan That Blow Cold Air w/Remote 5L Tank 12 Speeds 9H Timer, Evaporative Air Cooler for Bedroom Garage (White) |

|
| 2 | DREO Evaporative Air Swamp Cooler, 43" Cooling Fans that Blow Cold Air 2026 Upgraded, 80° Oscillating Floor Fan for Bedroom, Easy Cleaning, APP Control, Ice Packs, 4 Speeds & 4 Modes, 12H Timer, White |
|
| 3 | Portable Air Conditioners, 3-IN-1 Evaporative Air Cooler,Cooling Fans that Blow Cold Air with 60° Oscillation,9H Timer,3 Modes & 12 Speeds, 8 Ice Packs, Windowless Portable AC for Room,Bedroom,Office |
|
| 4 | DREO Tower Fan for Bedroom, 43" Cooling Fans That Blow Cold Air 2026 Upgraded, Evaporative Air Cooler, Quiet 80° Oscillating Floor Fan, Easy Cleaning, APP Control, 4 Modes & 4 Speeds, 12H Timer, Black |
|
| 5 | DREO Tower Fan for Bedroom, 2026 Upgraded DC Motor, 28ft/s High Velocity, 20dB Ultra Quiet Standing Fan, 8 Speeds 4 Modes, 90° Oscillating Bladeless Fan for Indoors, Floor Fans with Remote, Black |
|
| 6 | 3-in-1 Portable Evaporative Air Cooler - 2000 CFM Swamp Cooler with 6.6-Gal Dual Tank & 4 Ice Packs, Remote Control, 12H Timer, Oscillating Cooling Fan for Large Room, Office, Mother's Day |
|
| 7 | LEVOIT Tower Fan for Bedroom, 90° Oscillating Standing Fan with 28dB Quiet for Sleep, 25ft/s Velocity, 12H Timer, 5 Speeds 4 Modes, Remoter, Bladeless Room Fan for Home, Office, Indoor, 36 inch, White |
|
| 8 | Midea 5,000 BTU EasyCool Small Window Air Conditioner - Cool up to 150 Sq. Ft. with Easy-to-Use Mechanical Controls and Reusable Filter, Perfect for Small Bedroom, Living Room, Home Office |
|
| 9 | Evaporative Air Cooler - Swamp Cooler with 3L Water Tank, 3 Modes & 3 Speeds, Remote Control, 12H Timer, 50° Oscillating Portable Bladeless Cooling Tower Fan For Room Bedroom Office Mother's Day |
|
| 10 | Arctic Air Pure Chill 2.0 Evaporative Air Cooler by Ontel - Powerful, Quiet, Lightweight and Portable Space Cooler with Hydro-Chill Technology For Bedroom, Office, Living Room & More,Blue |
|
Ignoring these symptoms can lead to severe engine damage, making prompt replacement crucial.
Tools and Materials You’ll Need
Before embarking on your water pump replacement, gather all necessary tools and materials. Having everything on hand will ensure a smoother, more efficient process.
Essential Tools:
- New water pump (compatible with your vehicle)
- New water pump gasket(s) and O-rings (often included with the pump, but verify)
- Gasket sealant (if recommended by your vehicle manufacturer)
- Fresh coolant (the correct type and color for your vehicle)
- Drain pan (for old coolant)
- Socket and ratchet set (various sizes)
- Wrenches (open-ended and box-end)
- Torque wrench
- Screwdrivers (flathead and Phillips)
- Gasket scraper or razor blade
- Wire brush (for cleaning surfaces)
- Shop rags or towels
- Pliers (especially hose clamp pliers)
- Breaker bar (for stubborn bolts)
- Jack and jack stands (for safely raising the vehicle)
- Funnel (for refilling coolant)
- Safety glasses and gloves
- Optional: Anti-seize lubricant, paint pen (for marking orientation), replacement serpentine/timing belt (if needed).
Crucial Advice: Always consult your vehicle’s specific repair manual. This manual will provide exact instructions, torque specifications, coolant types, and any unique procedures for your make and model.
Safety First: Before You Begin
Safety is paramount when working on your vehicle.
- Ensure the Engine is Cold: Never work on a hot engine, especially the cooling system, as pressurized hot coolant can cause severe burns. Allow the engine to cool completely (several hours or overnight).
- Disconnect the Battery: Disconnect the negative battery cable first, then the positive, to prevent accidental starts or electrical shorts.
- Secure the Vehicle: Park your car on a level surface, engage the parking brake, and chock the rear wheels. Use a jack to raise the front of the vehicle and support it securely with jack stands. Never rely solely on a jack.
- Wear Personal Protective Equipment: Always wear safety glasses to protect your eyes from fluids and debris, and gloves to protect your hands from chemicals and sharp edges.
Step-by-Step Water Pump Replacement Guide
Follow these steps carefully to replace your car’s water pump. Remember that specific details may vary by vehicle, so refer to your service manual.
Step 1: Drain the Coolant
Place a large drain pan under the radiator. Locate the radiator drain plug (petcock) or the lower radiator hose. Slowly open the drain plug or remove the lower hose to allow the old coolant to flow into the pan. This process can take several minutes. Ensure all coolant is drained. Properly dispose of used coolant; it is toxic and harmful to the environment.
Step 2: Gain Access to the Water Pump
This step is highly vehicle-dependent.
- Remove Accessory Drive Belt(s): Most water pumps are driven by the serpentine belt. Use a wrench or breaker bar on the belt tensioner pulley to relieve tension and slide the belt off all pulleys. Take a picture of the belt routing before removal for easy reinstallation.
- Remove Mechanical Fan/Fan Shroud (If Applicable): If your vehicle has a mechanical fan attached to the water pump pulley, you’ll need to remove it and its shroud for access.
- Remove Battery (If Necessary): In some vehicles, removing the battery provides better clearance.
- Timing Belt Driven Pumps: If your water pump is located behind the timing cover and driven by the timing belt, this job becomes significantly more complex. You will need to remove the timing cover and potentially the timing belt itself. This often requires specialized timing tools and expertise; consider professional help if unsure.
Step 3: Disconnect Hoses and Components from the Water Pump
Once the pump is accessible, disconnect any hoses directly attached to it. These are usually held on by hose clamps. Use pliers to loosen and slide back the clamps, then carefully twist and pull the hoses free. Be prepared for additional coolant spillage.
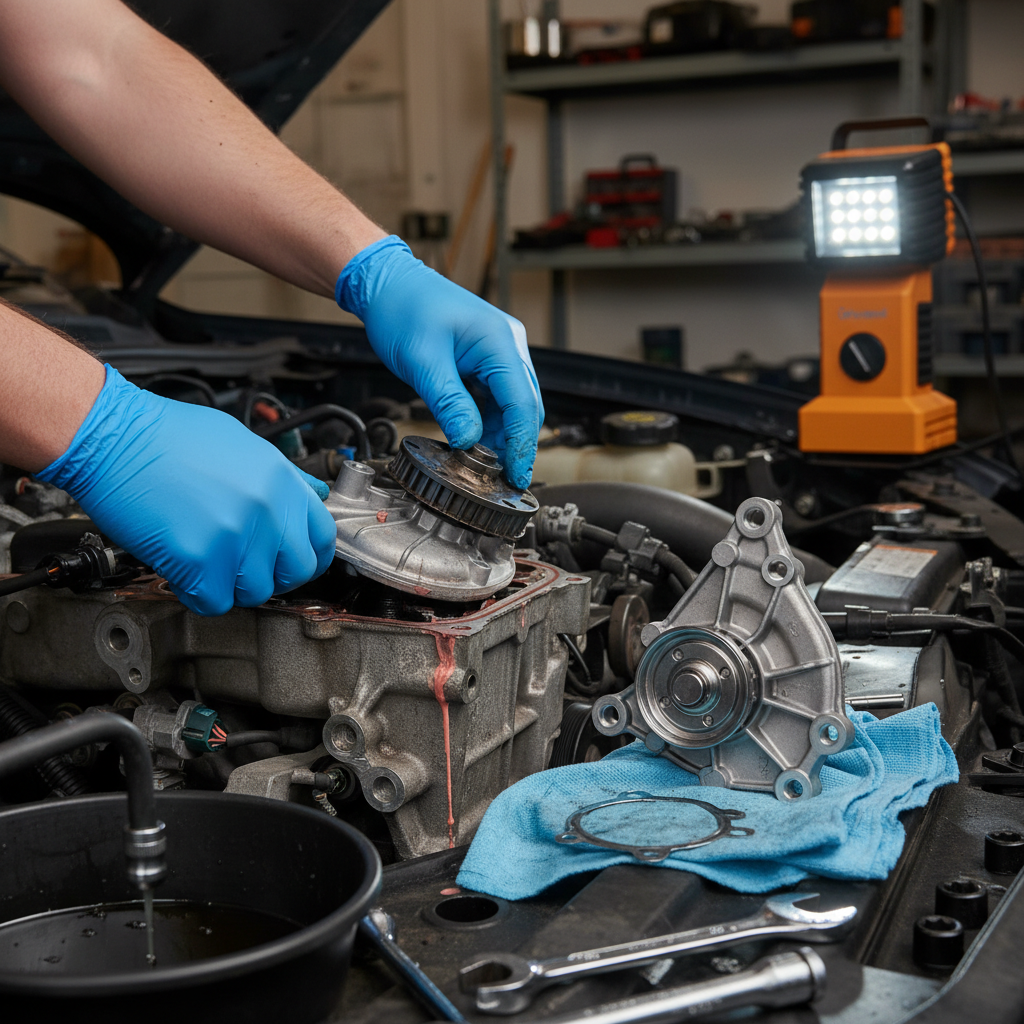
Step 4: Unbolt and Remove the Old Water Pump
Locate all the bolts securing the water pump to the engine block. Before removal, consider using a paint pen to mark the pump’s orientation relative to the engine block for easier installation of the new pump. Loosen and remove all bolts. You may need to gently pry the old pump away from the engine block, as it can be sealed tightly by the gasket. Have your drain pan ready for any remaining coolant.
Step 5: Clean the Mounting Surface
This is a critical step for preventing future leaks. Using a gasket scraper or razor blade, thoroughly remove all traces of the old gasket material, sealant, and corrosion from the engine block’s mounting surface. Ensure the surface is perfectly clean, smooth, and dry. You can use a rag with brake cleaner or a similar solvent to wipe it down. Any remaining debris can cause the new pump to leak.
Step 6: Install the New Water Pump
- Prepare the New Pump: If a separate gasket is used, align it with the bolt holes on the new pump. If your vehicle manufacturer recommends a sealant, apply a thin, even bead around the sealing surface of the new pump or gasket. Avoid excessive sealant, as it can squeeze into the cooling system and cause blockages. Never use sealant on O-ring style gaskets unless specifically instructed.
- Position and Fasten: Carefully position the new water pump onto the engine block, ensuring the gasket (if separate) remains properly seated. Finger-tighten all the mounting bolts first.
- Torque to Specification: Using your torque wrench, tighten the bolts in a crisscross or star pattern (depending on the number of bolts) to the exact specifications found in your vehicle’s repair manual. This ensures even pressure distribution and prevents warping or cracking of the pump housing, especially with aluminum engine components. Applying anti-seize lubricant to the bolt threads can prevent them from seizing in the future.
Step 7: Reinstall Hoses, Belts, and Components
- Hoses: Reattach all coolant hoses to the new water pump, ensuring the clamps are securely tightened over the connection points.
- Belts: If you removed the serpentine belt, refer to your routing diagram and reinstall it, ensuring it sits properly in all pulley grooves. Re-engage the tensioner. If a timing belt was removed, follow your vehicle’s manual precisely for timing marks and tensioning; improper timing can lead to catastrophic engine damage.
- Other Components: Reinstall the fan, fan shroud, battery, or any other components removed to gain access.
Step 8: Refill the Cooling System
- Correct Coolant: Pour fresh, factory-specified coolant into the radiator. Use a 50/50 mix of coolant and distilled water, or a pre-mixed solution. Never use tap water, as its minerals can cause corrosion.
- Bleed Air: Fill the radiator slowly. Start the engine with the radiator cap off and the heater turned to its highest setting (fan speed doesn’t matter, just the temperature setting). Allow the engine to idle and reach operating temperature. As the thermostat opens, the coolant level will drop as air bubbles escape. Continue adding coolant until the level stabilizes and no more bubbles appear.
- Expansion Tank: Fill the coolant reservoir/expansion tank to the “full cold” mark.
Step 9: Check for Leaks and Test the System
- Initial Inspection: While the engine is idling, visually inspect the new water pump and all hose connections for any signs of leaks. Small seepage from a new pump’s weep hole during the first few minutes of operation is sometimes normal as the internal seal seats, but continuous dripping is cause for concern.
- Temperature Monitoring: Keep a close eye on your car’s temperature gauge. It should remain within its normal operating range.
- Test Drive: Take your car for a short test drive. After the drive, allow the engine to cool completely, then recheck the coolant level in both the radiator (if applicable) and the expansion tank, topping off as needed. Repeat this check over the next few days.
Common Mistakes to Avoid
- Not Consulting the Manual: Every vehicle is different. Your service manual is your ultimate guide.
- Improper Coolant: Using the wrong type of coolant can cause chemical reactions that damage components.
- Insufficient Cleaning: Failing to thoroughly clean the mounting surface will almost guarantee a leak.
- Incorrect Torque: Over- or under-tightening bolts can lead to leaks, stripped threads, or component damage.
- Air Pockets: Not properly bleeding air from the cooling system can cause localized overheating and pump cavitation.
- Reusing Old Gaskets/Seals: Always use new gaskets and seals.
When to Consider Professional Help
While a DIY water pump replacement can be cost-effective, there are situations where professional assistance is advisable:
- Timing Belt Driven Pump: If your water pump is driven by the timing belt, the job is significantly more complex, requiring specific knowledge and tools to ensure proper engine timing. Incorrect installation can lead to severe engine damage.
- Lack of Specialized Tools: Some vehicles require specialized tools for belt tensioning or component removal.
- Limited Mechanical Experience: If you are uncomfortable with the steps or lack basic mechanical experience, a professional can ensure the job is done correctly and safely.
- Time Constraints: A water pump replacement can take several hours, especially for first-timers. If you’re short on time, professional service might be more practical.
“A water pump replacement, while challenging, is a foundational DIY repair that significantly enhances your understanding of vehicle maintenance. Just remember: meticulous cleaning and proper torque are your best friends for a leak-free outcome.” – John Smith, Master Automotive Technician
Conclusion
Replacing your car’s water pump is a substantial DIY project that can save you money and give you a deeper understanding of your vehicle’s mechanics. By carefully following these step-by-step instructions, prioritizing safety, and referring to your vehicle’s specific service manual, you can successfully restore your cooling system and keep your engine running smoothly. Regular maintenance, including periodic coolant flushes, can also extend the life of your water pump and prevent future issues.
Have you replaced a water pump yourself, or are you considering tackling this repair?
Frequently Asked Questions
How long does it typically take to replace a car’s water pump?
The time required varies significantly depending on the vehicle’s make, model, and engine configuration, as well as your mechanical experience. For a serpentine-belt-driven pump, it might take 2-4 hours for an experienced DIYer. A timing-belt-driven pump can easily take 6-8 hours or more due to the additional complexity.
Do I need to replace the serpentine belt or timing belt when changing the water pump?
It’s highly recommended to replace the serpentine belt, and essential to replace the timing belt if the water pump is driven by it. Both belts are wear items, and replacing them simultaneously saves labor since you’ve already disassembled components to access the pump. This is excellent preventive maintenance.
What are the dangers of not replacing a faulty water pump?
Ignoring a failing water pump can lead to severe engine overheating, which can cause costly and catastrophic damage, including warped cylinder heads, blown head gaskets, or even a seized engine. Prompt replacement is crucial to avoid these extensive repairs.
Can I use universal coolant?
No, it’s critical to use the specific type and color of coolant recommended by your vehicle manufacturer. Mixing incompatible coolants can lead to chemical reactions that form sludge, corrode cooling system components, and reduce cooling efficiency, potentially causing more damage.
How often should a car’s water pump be replaced?
Most water pumps are designed to last between 60,000 to 100,000 miles, but this can vary. Factors like driving conditions, coolant quality, and engine type can affect its lifespan. It’s often replaced as part of a routine timing belt service if it’s timing-belt-driven.